Unerase Mac Hard Drive Data with Ease
Macintosh data recovery can be very difficult once the Trash folder has been emptied. In many cases, unerase file from Mac may only result in partial data recovery if you haven't take immediate actions.
Here I am trying to tell you some techniques which could minimize the risk when data loss happens.
Trash Folder in Mac
The first thing to do is to check the Trash Folder for the deleted file. The Trash folder in Mac OS X is actually a private, hidden directory located in each user's Home folder. The path to the folder is ~/.Trash. If additional hard drives or USB sticks are attached to the system, those drives contain an invisible directory called .Trashes, which in turn contains a hidden Trash folder for each user.
After the Trash is emptied, the file is deleted but the remnants of the file are not overwritten immediately. The space occupied by deleted files is considered free hard drive space by OS X. Over time, the remnants of deleted files are overwritten and lost forever.
If the Empty Trash Securely option was enabled, it is highly unlikely that any data can be restored. Even though many people stick with the default of not emptying Trash securely for performance reasons, OS X still enables Empty Trash Securely option for a small minority of people. The reason why file recovery is impossible with Empty Trash Secure is because the drive data is overwritten several times to ensure there is no chance of recovery.
The next thing to do is to minimize the write activity on the hard drive with the deleted file. Immediately after the file has been deleted, refrain from using the system. The more times the system is used, the less likely any data recovery will be possible.
Using uFlysoft Mac Data Recovery Software
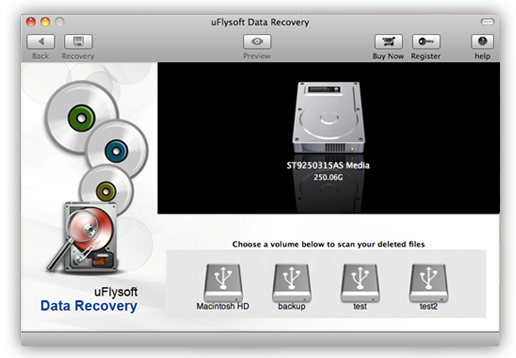
With the many Macintosh data recovery software available, I recommend uFlysoft Data Recovery Software for Mac. Once the data recovery software is running, the program starts to look for deleted files and asks the user which files to restore.
Salvaged data needs to be written to a separate partition or USB stick. If recovered data is written to the same partition, it may start overwriting the data that's in the process of being restored. It is very danger to lost data.
Let's follow the steps to perform Mac data recovery with ease.
1. Donwload the free trial of uFlysoft Data Recovery Software and launch the program.
2. Start scanning out your lost data and preview them one by one(Only the photos can be preview).
3. After the secondly step, choose which file you want to recover and click "Recover" button and choose the path where you want to save the recovered data.
See? It's so easy for you to recover lost data by yourself!
Tips
If you want to recover your lost photo on Windows OS computer, just have a try on uFlysoft Photo Recovery for Windows.