Recover Lost Photo When Transferred from Store Device to Computer
Have you ever been troubled by this? You were cautiously transferring your photos from camera to computer, but somehow the photos "disappeared". You wondered how it could happen and wanted to recover lost photos during data transfer, while sometimes you successfully do that, sometimes you just failed.

Here I'd like to tell you some scenarios which may cause photo loss and how to recover photos lost while transferring from a store device to computer.
How to recover photos lost during data transfer?
After you lost photo in data transferring from camera to computer, search it immediately in both the store device and the computer. If you previously chose to 'Cut' the photo but failed to 'Paste' it on the computer, you may try pasting it again (paste in a place where there is enough space). If the photo can be pasted again, congratulations, your photo is back.
If the photo is still lost, you may try some photo recovery software. After the photo was lost, the data are not always lost, just not visible or readable because the entry index of the system makes a special mark on those data hinting this area can be written over by other new data. So keep in mind: do not put more photos or other data in the same place where your lost picture was stored, since once you put other new files in it, this free space will be overwritten by others, which makes it difficult to recover lost photo.
In this case it is advisable to try picture recovery software to check if your lost picture can be recovered.
For Windows users, you can try uFlysoft Photo Recovery for Win. This risk-free program can recover photos lost from store device or computers with original quality. At the same time, the trial version can let you preview the effects in the thumbnail to see whether your pictures are recoverable or not. Here my suggestion is to scan the store device and computer both, improving the success rate of recovering lost picture.
Steps to Recover Lost Photo
With this powerful and high reputation recovery tool, what you need to do is take a cup of tea and some cookies, sit in front of your computer and do a few click jobs follow the easy-to-use "3-step" recovery operation. Without further ado, let's check it out.
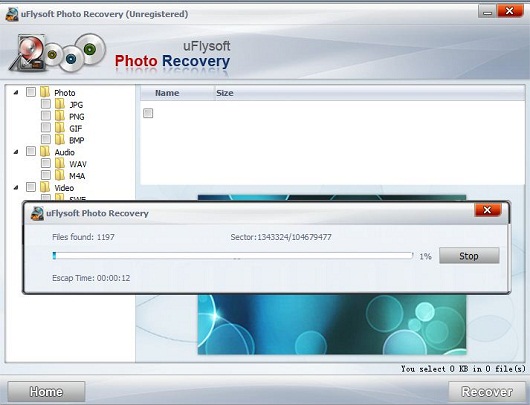
1. Download and install the uFlysoft Photo Recovery on your computer. Launch the application, choose the drive which your photo were store before, click "Scan" button to scan automatically.
2. After scanning is finished, you will find lots of photo files you deleted are all found and recoverable. You can choose the format of your photo to preview and decide if you want to recover it or not.
3. Once you choose the photo and after confirmation, click the "Recover" button, then after a few minutes, the photos will come back to you.
Tips
1. As a good media data recovery tool, uFlysoft Photo Recovery can do more for you, it is not only an photo recovery program, but it also can act as a video and audio files recovery tool for you. In a word, it's a good idea for you to have such an all-in-one media data recovery program.
2. If you want to get back more data on your Mac, such as Word, Excel, have a try on uFlysoft Data Recovery for Mac.