Best Ways to Recovering Deleted Documents in Word for Mac
Introduction
Losing critical data is traumatizing enough and everyone will try anything to get them back as soon as possible. According to surveys, data loss is normally occasioned by hardware or system malfunction e.g. electrical fault, head-crash or controller failure among others. Elaborate data recovery techniques should be put in place to mitigate the effects of data loss.
This article takes a walk-through into helpful tips of recovering lost Word documents in Mac environment.
(i) Recovering Lost Word documents on Mac
A file may be missing because it was accidentally deleted; this shouldn’t be devastating as it sounds since the document may be residing in the Trash folder. You can check this by opening the Trash icon in the dock, peruse through the contents and if it is there, right-click it then select put back. This will automatically reinstate it the original folder.
(ii) Word Auto-recover feature in Mac
Word application for Mac has an incorporated default functionality called AutoRecover. It automatically saves your work in the background every ten minutes after the initial saving. If a document is unexpectedly lost due to a computer or software malfunction, you will be prompted to auto-recover the file during a restart of the Word application. If at all this isn’t the case, you will still be able to recover it in the AutoRecover folder.
To navigate this in Word 2011, click File on the Menu bar and search for AutoRecover, confirm the dates and choose the appropriate AutoRecover folder. Once found, open the file and remember to save it appropriately in a known location with a known file name.
This isn’t the case when you are using Word 2016; the AutoRecover folder is deep buried in the system files and is deliberately hidden to prevent any damage that may occur. A navigational link is hereby provided for this: library/Containers/com.microsoft.Word/Data/Library/Preferences/AutoRecovery/
Extreme care need to be taken when dealing with auto-recovered files, any small interference may completely lead to its permanent loss.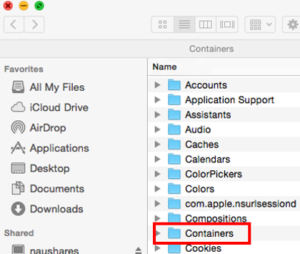
(iii) Viewing all files in Auto Recovery Folder Office 2011
On the Finder and press Options, then select Go from the Menu, then press Alt. This will make all files in the Library folder visible. It is worth noting that the frequency of auto-saves can be adjusted on Word for Mac. By default, it saves after every ten minutes but this can be set to meet the user’s preference. This can be done by following the following procure;
Go the Menu bar at the top of the screen then click Word. Select Preferences from the drop-down bar and then output & sharing section. Click on save then adjust the time by entering a value into the “save every x minutes” box.
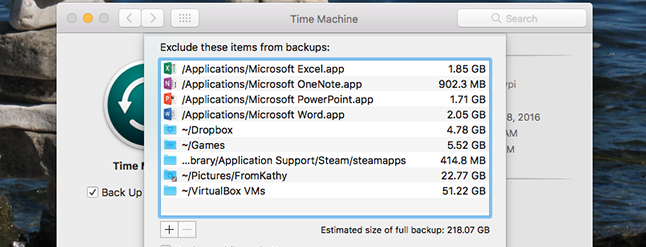
(iv) Recovering from theTime Machine
If you are using the Time Machine, you should be able to roll back to when the deleted file was on your system. You should be able to set the backup routine on the Time Machine. Backup instances are very important since they will perform automatic backup of the happenings in Mac and alternatively you can get a copy in-case of any eventuality.

About Author
steven
10 years of file recovery experience makes Steven, the professional expert helps our users to handle the data rescue process easily. And he also write lots of technical support articles for the readers to follow to get the tips to recover their files in simple ways.